Monday, January 29, 2024

Power Bi Report - Data Load from Multiple Files

 Requirement

Load data from multiple files into Power BI Report for the reporting.

Require Tools

  • PowerBI desktop
  • Data load files in CSV

Prepare Data Load files

Create one folder and save few csv files as shown below -


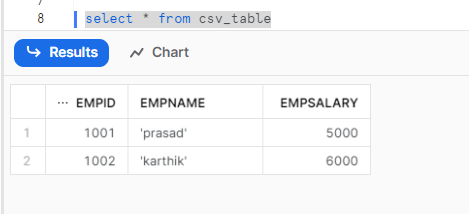
Files format or sample data is like below:-


Every day we will get a file with server log details.

For example, if today we have three files and based on that PowerBI report has been created then report will show loaded data, but let say tomorrow a new file is added then after just by refreshing the report it should show new file data as well.

Lets first create report based on existing files.

PowerBI report development

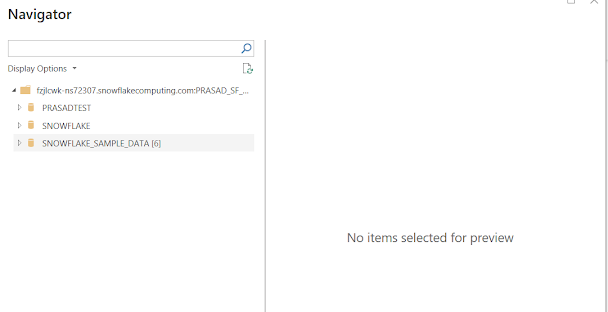
Launch the PowerBI desktop and select Get Data and select Folder


After selecting the folder, it will ask for the folder path, provide the path of your source files


It will identify the number of files currently in the folder.


Combine and Load the files as we are not doing any transformation on the files


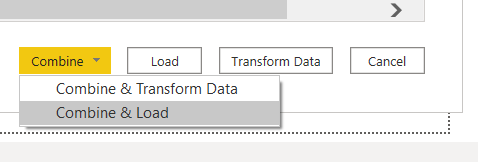
Press Ok on above screen, data is loaded and can see the list of fields in report Fields Pane


Now use the fields to create the report.


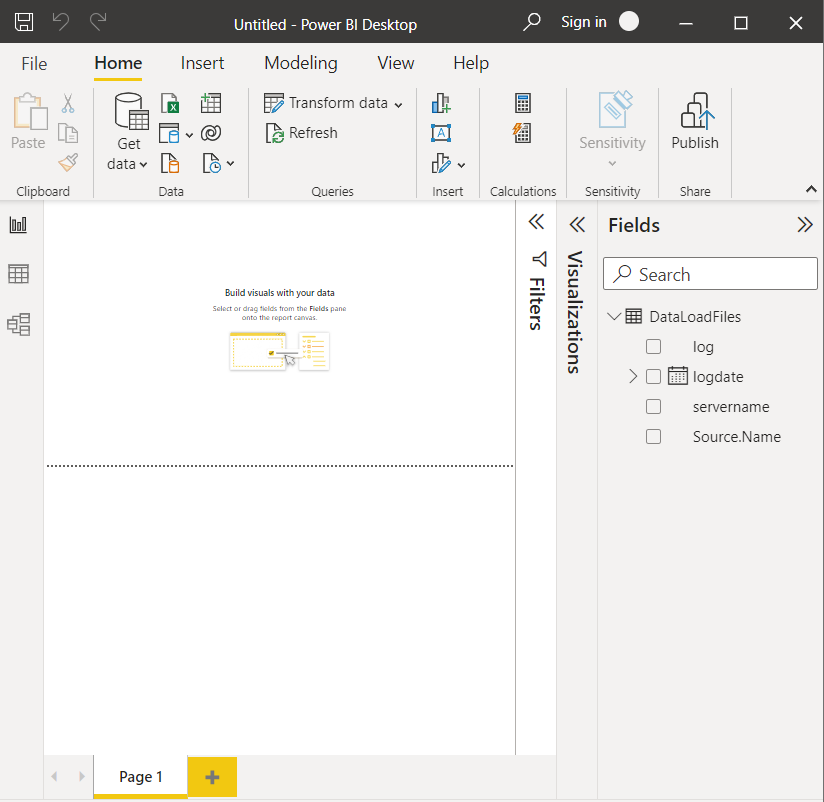
In above report we can see data till 3-Jan as we have loaded 3 files starting from 1st Jan to 3rd Jan.

Now, we will add one more file with 4-Jan and will see the data refresh in the report.


After adding new file lets refresh report as shown below :-

By clicking refresh the report is refresh with the latest file data as we


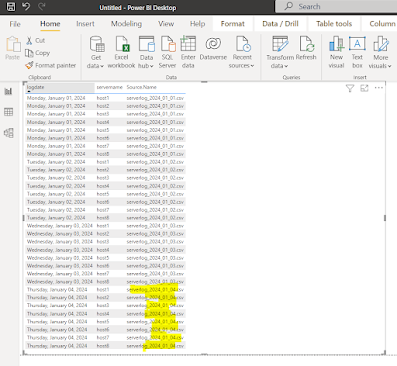
We have seen that PowerBI report can load data from multiple files on daily.


Sunday, January 28, 2024

SSIS Connecting Snowflake Database


Requirement

Snowflake as source or destination when using in SSIS as ETL tool.

Tools needed.

  • Snowflake ODBC 32-bit driver - download link - ODBC - Snowflake Developers
  • Snowflake account.
  • SSDT (SQL Server Data Tools) with Visual Studio.

Install & Configure Snowflake ODBC Driver

Install only 32 bit ODBC driver if SSIS is 32 bit installed. In my case I have installed 64 bit ODBC driver first and find issues in SSIS as it was not showing in the ADO.NET task after selecting ODBC as connection.

After I installed 32-bit ODBC driver, I am able to see the DSN in my ODBC source.

Create DSN (data source name)

After installed Snowflake DSN, open the ODBC Data Sources (32-bit) by typing in the start in your PC.


Below screen will come, here we need to add new DSN using Snowflake driver.


In User DSN tab, click Add and look for Snowflake driver and select it and click finish.


Provide the connection details of your Snowflake account and click Test.


DSN is created successfully.

Configure ODBC Source In SSIS


Create new SSIS package and select ODBC Source as shown below:-


Create new ODBC connection and configure to select the DSN created before as shown below:-


After connection setup properly, when we use to look for the tables in the source it is throwing the error.


This is kind of known issue, and some databases ODBC connection does not work.
Let's switch to ADO NET source to connect the DSN.

Configure ADO NET Source In SSIS


Select the ADO NET source and configure as shown below: -


After selecting ODBC driver in above screen below screen will appear and where after selecting the DSN created by us in above step can be selected and tested the connection.


Now able to preview the list of tables available in the database.


After selecting one of the tables, we can preview data as well.


Pipeline/Package Validation

After enabling the data viewer in the SSIS, we can see the data when pipeline/package is executed.

Another way by checking the executed query on the Snowflake Activity under Query History


This is how we can connect Snowflake using SSIS.


Saturday, January 27, 2024

Power BI Desktop Report Connecting to Snowflake Database


Requirement

    Develop the power bi report using Snowflake as source of data.

Tools needed

  • Snowflake account.
  • Power BI Desktop        

Explore Data in Snowflake

    Let's connect to Snowflake account in web, Below screenshot is the interface of the Snowflake


Go to the Data section highlighted above.
We can use the sample data provided by Snowflake.

You can navigate from Data tab to see the sample data as shown below-
Data -> Databases -> SNOWFLAKE_SAMPLE_DATA ->  TPCH_SF1 ->  Tables


We can use above tables to do reporting on PowerBI

Connect Snowflake In PowerBI

Open the PowerBI desktop and select Get Data, it will open below like screen. Select Snowflake from the list of different databases and click Connect.


After clicking on Connect, it will ask for the server details and warehouse.


Enter the details like 
Server -  <your_account_identifier>.snowflakecomputing.com
e.g. my server - fzjlcwk-ns72307.snowflakecomputing.com

Warehouse - You can create your own warehouse as shown below screenshot.
Basically, warehouse is the cluster which helps to run the code or in data load.


My details for connecting Snowflake database is shown below-
After connected to the source, all the databases having access I can see in the Navigator.


Select the required tables to add into the PowerBI model and click Load.


After Load, you need to select its Import or DirectQuery, we will select Import for now.


It will start loading the data.


All the tables were loaded and can see in the PowerBI Data pane.


Go to the Model and establish the relationship between the tables as if we don't do that then the data will not be related and show wrong (it apply cross join).

After establishing the correct relationship, we can see the model like below-


Go to Report view and use the fields to create the report


We successfully created the PowerBI report using Snowflake database,


Snowflake - Load files from local drive


Requirement

We want to load the data into snowflake using local files present in the desktop,

Require tools for file load.

  • Snowflake account
  • Snowsql installer.
  • Sample CSV file.

Snowflake Account Overview

I am using trail version and its looks like below -


Account identifier is important that we need to login into snowsql. That you can get it from the Snowflake access URL as highlighted above.

Account Identifier = fzjlcwk-ns72307 (this is my account identifier; you will get new one)
Username and Password details when you create your login.

Create table in Snowflake

This table will hold the data when we load from csv.


CSV file

csv file having data with delimiter tab (\t) and which is defined in above when creating the table in snowflake.


Snowsql 

Download the SnowSQL - SnowSQL - Snowflake Developers

As the file upload from local to snowflake is supported through command line and it is not supported using web api.

After installing the SnowSQL , open the command prompt in windows.

Verify its installed by running.
$snowsql -v


 Login to snowflake using command line
$snowsql -a <account identifier>  -u <username>

It will prompt for password and after successful authentication it will show like below:-


Now you need to select the warehouse and database and schema where your table exists.

Three commands to execute to get to the location where your data load table is present.

USE WAREHOUSE <your_warehouse_name>;
USE DATABASE <your_database>;
USE SCHEMA <your_schema>;


Upload the file into stage by running below command: -

PUT file://C:\Prasad\Snowflake\csv_load.csv @%csv_table;


Data is loaded into the snowflake stage. Now we need to copy the data into destination table.
By running below copy command it will load the data into the required table.

COPY INTO csv_table;


Now data has been loaded into the table. We can validate by checking the table data in the worksheet.


So, we are successfully loaded the data into Snowflake.

Python Tricks Part-1

Python - Tricks - Part-1 Printing Horizontally  Default it will print one after another list1 = [ 1 , 3 , 6 , 7 ] for number in list1: ...